While many users master Word and Excel, Microsoft Access often feels more intimidating as part of the Office suite. As a database professional with over a decade of experience building custom solutions for businesses and individuals, I've guided countless beginners through its basics. This hands-on tutorial will show you how to create a database, add data, and run queries—getting you up to speed quickly and confidently.
When you launch Access, you'll see various templates and options. Choose Blank desktop database, name your file, and select a save location. For this example, I'll build a personal book collection database—a versatile approach that works equally well for mailing lists, contacts, or inventories.
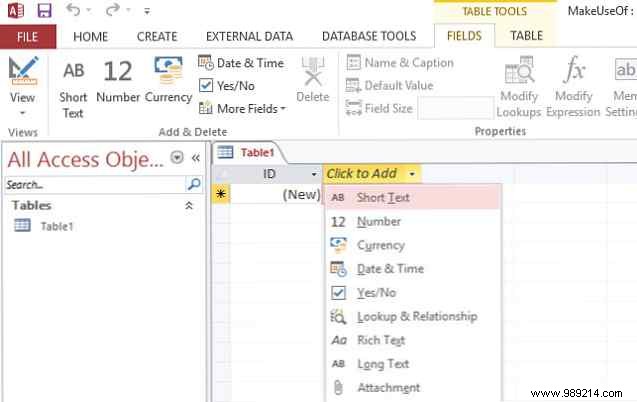
Click Click to Add for your first field (e.g., book title) and set it to Short Text. Rename the field and table (from default "Table1") for clarity. Repeat for other fields: author's name (Short Text), publication year (Number), hardcover (Yes/No), and date added (Date/Time).
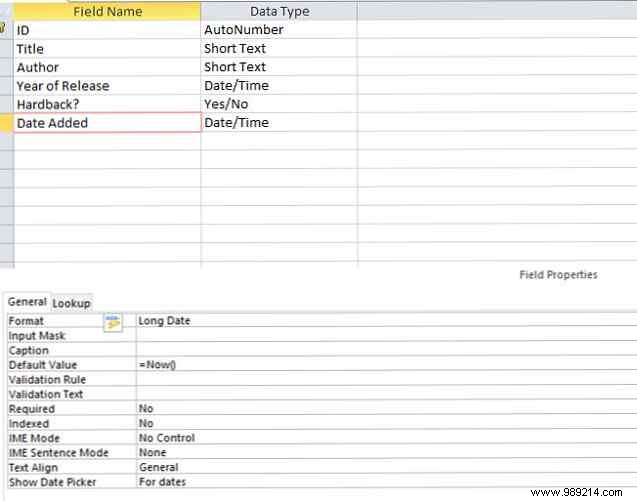
To edit fields later, go to the Fields tab, select the column, and update via Data Type. Switch to Design View (bottom-right icon). For the Date Added field, set Data Type to Date/Time, then enter =Now() in Default Value to auto-timestamp new entries. This technique applies to other defaults too—perfect for streamlining data entry.
A primary key uniquely identifies each record, preventing duplicates and ensuring reliability—essential for scalable databases. Access auto-generates an ID field, but in Design View, right-click any unique field (e.g., ISBN) and select Primary Key if preferred.
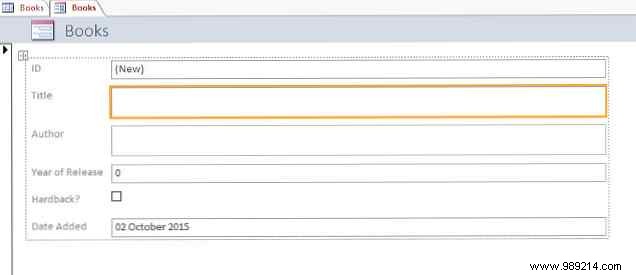
Forms simplify data entry, especially for teams. Go to the Create tab and click Form for an instant layout. Drag elements to customize, then switch to Form View to test. Add a sample record, save, and verify in Datasheet View.
Forms standardize input, but Datasheet View allows quick manual additions.

Import existing data via External Data tab—supports Excel, CSV, XML, HTML. Note: Import copies static data; Link keeps it live-updating.
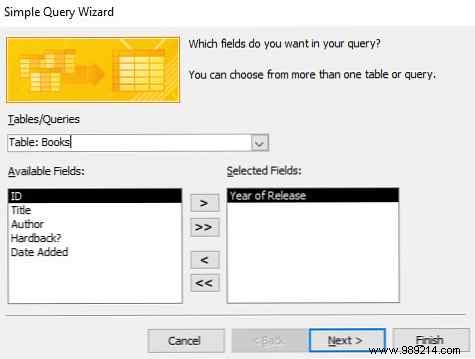
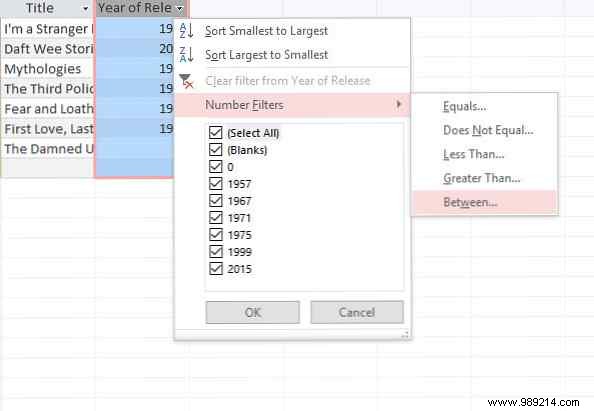
Queries unlock your data's power. On the Create tab, select Query Wizard > Simple Query Wizard. Pick your table and fields (e.g., Title and Year).
Choose Detail or Summary, finish, then filter: For 1970s books, use Year dropdown > Number Filters > Between (1970-1980).
Adapt for text, dates, or checkboxes. What's your Access challenge? Share tips or questions in the comments—happy to help!