Microsoft OneNote stands out as a powerful note-taking app deeply integrated with the Office ecosystem, extending far beyond basic lists and notes. If you've wondered whether a wiki could help organize complex information, OneNote offers an accessible way to test the concept. As a productivity expert with years of experience using OneNote for teams and personal projects, I've found it transforms workflows. Below, I'll explain what a wiki is and walk you through creating one.
The world's most famous wiki, Wikipedia, exemplifies the format: a collection of content richly linked for easy navigation, often built collaboratively. Wikis don't need to be polished—especially in a personal tool like OneNote. Treat it like your personal notebook, prioritizing utility over aesthetics.
Traditional wikis rely on content management systems hosted online with user accounts. OneNote flips this: it's free, cross-platform, quick to set up, and easy to share—especially for Microsoft account users. Ideal for small teams handling categorized, navigable information, such as:
For this guide, we'll build a wiki for home moving and renovation info.
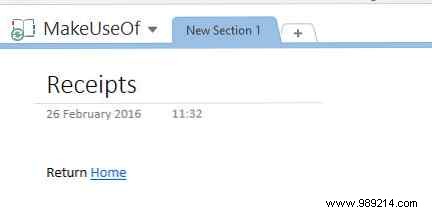
Your home page is the entry point. Design it for quick orientation.

This example includes an optional image for visual appeal. Custom touches make OneNote feel like a real notebook, enhancing usability.
Core to wikis: inter-page links. Since Office 2010, OneNote supports wiki syntax—type [[Page Name]] to auto-create a link and page.
Add backlinks for bidirectional navigation. Link strategically to save time on frequent jumps.
For cross-notebook links, highlight text, press Ctrl + K, or go to Insert > Link. Browse pages, files, or web locations.
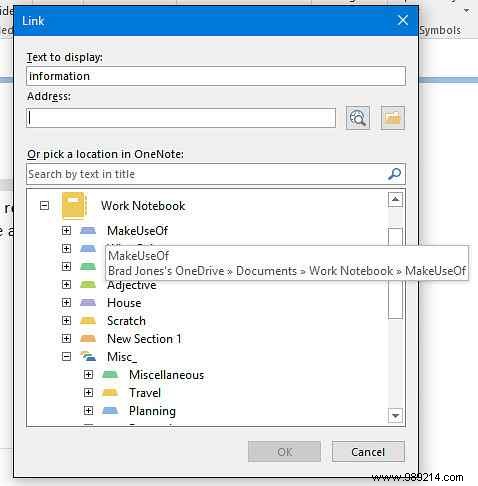
Create reciprocal links if you'll navigate between notebooks often.
OneNote's native support for diverse media—images, files, tables—makes it a robust wiki alternative, no extensions needed.
Use Insert > Files > File Attachment for editable files, or File Printout for reference.
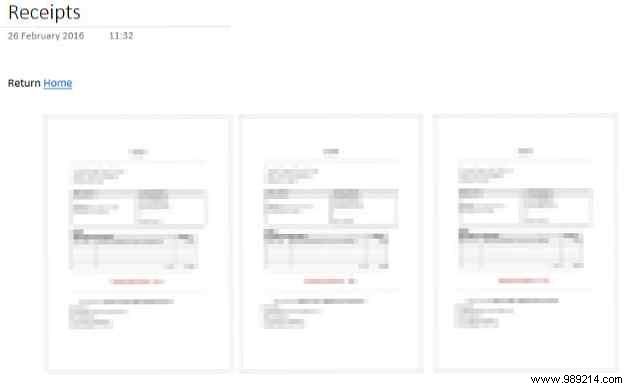
Example: Embed PDF receipts on relevant pages for easy access.
Right-click attachments for OCR. OneNote auto-indexes images/files by default, but tweak via File > Options > Advanced.
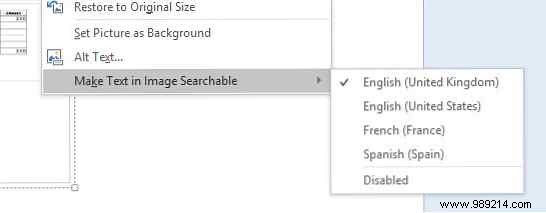
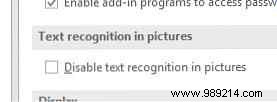
In Advanced Options, adjust OCR levels for speed vs. accuracy.
Go to Insert > Spreadsheet > New Excel Spreadsheet for live, editable embeds.
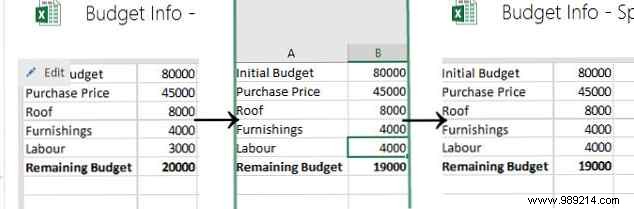
Changes sync instantly. Experiment to find what fits your needs.
Test it in real workflows to refine. As someone who's managed projects this way, I recommend starting small and iterating.
Share your OneNote wiki tips or questions in the comments!