Microsoft PowerPoint includes a powerful yet understated tool in the ribbon called Set Transparent Color. This feature lets you remove an image's background, creating true transparency. As someone who's designed countless presentations and infographics using PowerPoint, I find this invaluable for crafting professional visuals. It's perfect for infographics—check out our guide: How to Make a Free Infographic with PowerPoint.
This works only on embedded images, not on images used as shape fills where the option won't appear. The steps below use screenshots from Office for Mac, but they're identical on Windows.


Keep in mind: Set Transparent Color isn't as precise as Photoshop's Magic Wand. It has two key limitations:
There's no fix for the first issue, but for the second, protect key areas with shapes.
Draw a Freeform shape over any area containing the color you want to keep transparent (like this):
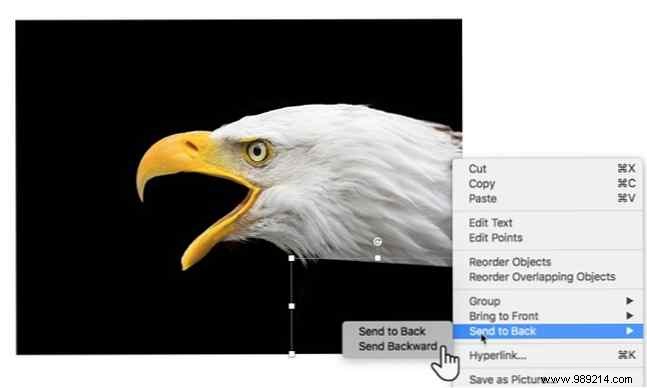
Fill the shape with the transparent color (e.g., black here), then right-click and select Send to Back > Send Backward to layer it behind the image but in front of the slide background. Now apply Set Transparent Color—it'll skip the protected shape.
This feature originally supported only PNG and GIF files, but newer versions handle PDF and JPEG too. Solid-color backgrounds yield the best results.
Pro Tip: For more advanced control, combine this with PowerPoint's shape tools for pro-level edits.