What’s your favorite low-tech productivity tool?
Many of my colleagues swear by Post-it notes. Others prefer their plainer counterpart, the simple tab.
Ask around, and you might discover friends with stacks of index cards for learning languages, preparing presentations, or using as flashcards for memory aids.
For me, affordable index cards are invaluable when juggling countless details. That small rectangle of paper simplifies life with a few key notes or a quick sketch. I rely on them to capture the life hack tips I encounter daily, like those in How to Easily Organize and Remember All the Life Hack Tips You've Read. We forget if we don’t review—and that’s the challenge with endless advice. The good news? Simple tools like these help us retain it.
I’m far from alone in this. Countless professionals value their straightforward productivity boost.
Even Carl Linnaeus pioneered the use of index slips three centuries ago to combat information overload—a problem as relevant today as ever.
With today’s data deluge, index cards sharpen our focus and memory. Grab a pack from your local office supply store, or save money by creating them digitally in Microsoft Word. This is how you can get Microsoft Word for free. It excels at producing custom index cards.
Choose the right dimensions and cardstock paper for printing—we’ll cover three proven methods below.
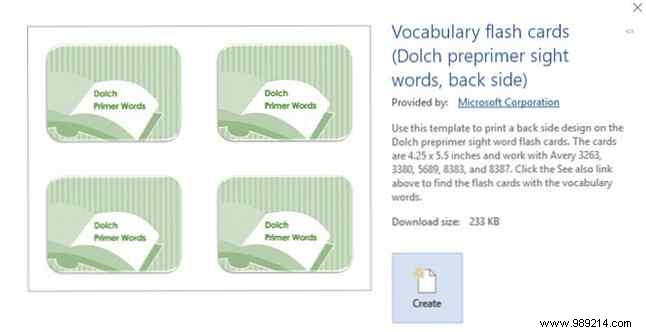
Templates save hours. Microsoft Word’s gallery includes plenty, as highlighted in 10 Templates to Save Time in the Office. Index and flash cards are easy to find.
Open Word, go to File > New, and search for index card.
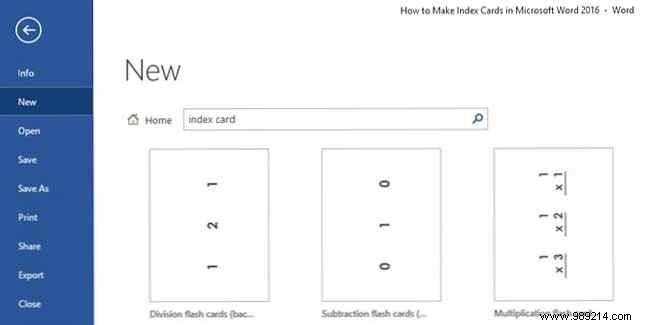
Thumbnails appear; browse visually or filter by category. For specifics, refine your search.
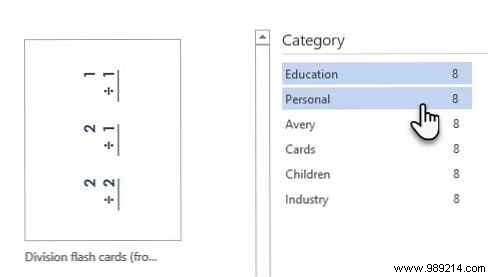
For instance, search “flashcard” to access templates for English or math basics. Select one to open as a new document.
Customize fonts, colors, or content as needed. Learn more in How to Style Fonts in Microsoft Word to Make Your Text Pop.
Templates don’t always fit perfectly. Building your own ensures compatibility with your printer and exact needs—Word makes it straightforward.
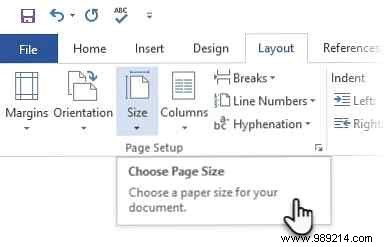
Open a new document. Switch to the Layout tab, then click the small arrow in the Page Setup group.
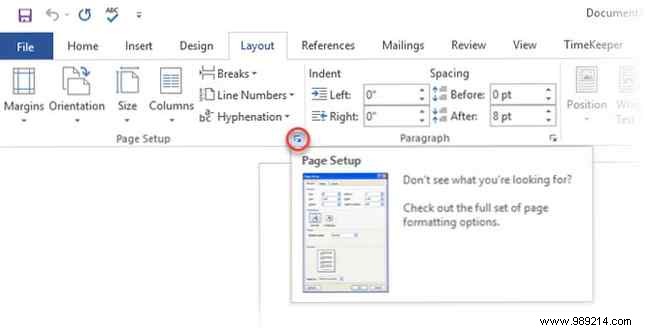
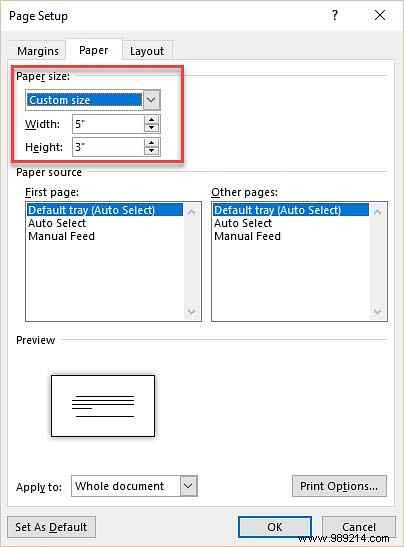
In the Page Setup dialog, select the Paper tab. Choose a preset size or Custom Size at the bottom. Enter your card’s Width and Height, then click OK.
Alternatively, use the Size dropdown on the Layout tab for quick access to the same options.
Common sizes include 3x5 inches (standard in North America/UK), 4x6, 5x8, or ISO A7 (74x105 mm).
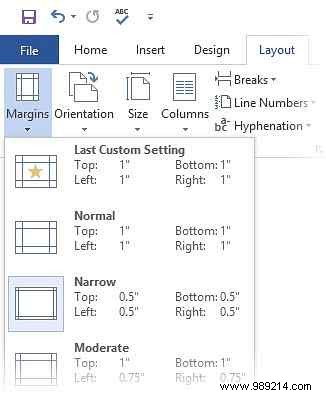
For binder use, add space for holes. Adjust margins via Layout > Margins—try Narrow (0.5") instead of default 1".
Word defaults to portrait orientation; toggle to Landscape via Layout > Orientation for flashcards or recipes.
Design freely for your needs. Add text, images from sites like The Best Websites to Download Free Images. Press Enter or insert a page break for the next card. Repeat as needed.
Open a blank document and go to Mailings.
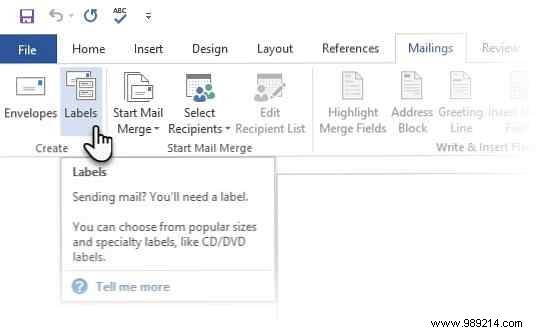
In the Create group, click Labels. Switch to the Labels tab and select Options.
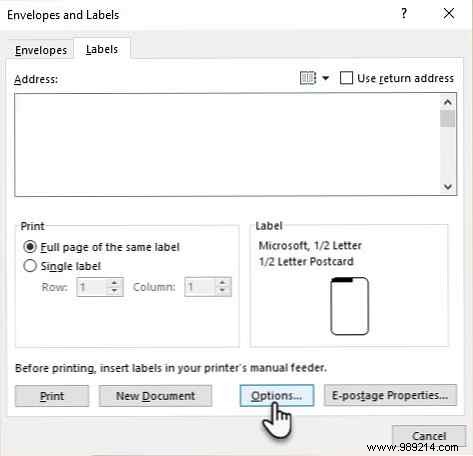
Browse vendors like Microsoft or Avery. Pick a product like Avery #5388 (three 3x5 cards per 8.5x11 sheet). Note dimensions on the right.
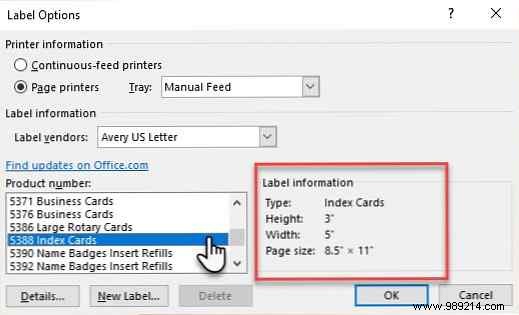
Verify settings with Details; adjust page size if needed.
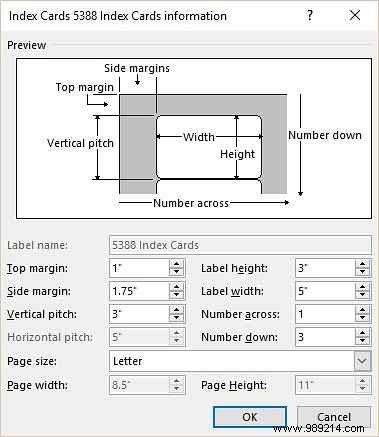
For customs, click New Label and input dimensions.
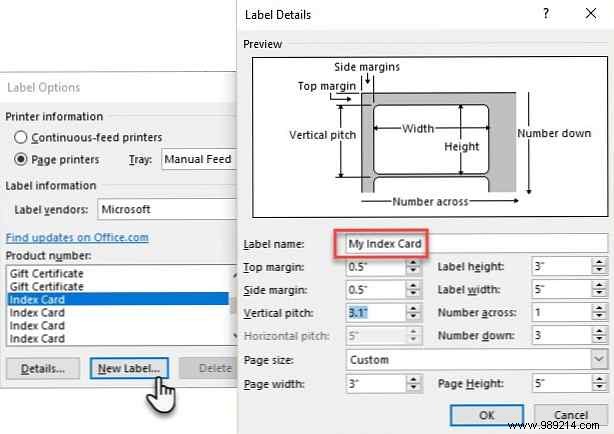
Click OK, then New Document. Dashed lines outline your cards—add content, print, and cut. Repeat for more sheets.
Don’t overlook paper’s power, as explored in 6 Simple Reasons Paper May Still Be Your Killer Productivity App.
Perle Mesta said sophistication is simplicity—long before it became a tech mantra. Even Google nods to index cards in tools like Knowledge Graph and Keep, as Android UX director Matias Duarte noted in Co.Design.
Channel Maria Popova’s idea capture, Reagan’s quips, or Nabokov’s plotting. Or simply leave sweet notes for loved ones.
Share your index card stories and creative uses in the comments!