If you're a dedicated Evernote user, your account likely holds invaluable information. Losing it could be disastrous.
Evernote stores notes both locally on your device and on its servers, so reinstalling after deletion is straightforward—just download the synced version. But is that sufficient? Not entirely:
Though rare, regular backups ensure recoverability. Here's how, based on years of managing Evernote data reliably.
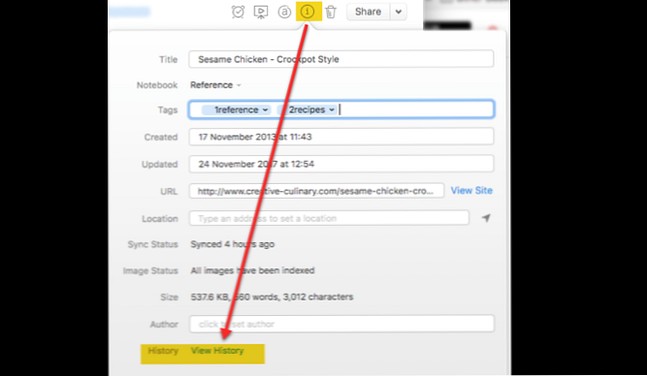
Premium users benefit from Note History. To revert changes: Open the note, click the i icon on the toolbar, select View History, and restore the desired version.
This relies on Evernote's servers. For independent backups under your control, read on.
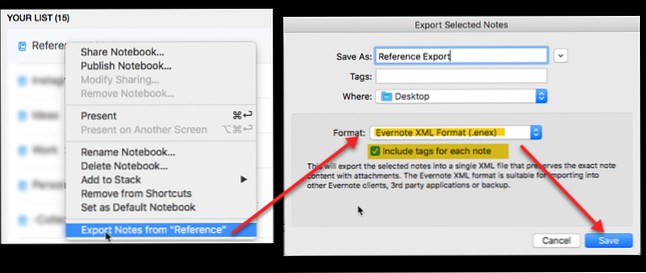
The desktop app's export tool is ideal for notes, notebooks, or selections. Save exports to cloud storage or external drives regularly.
On Windows:
On Mac:
.ENEX files preserve notes and tags for easy import. Notebook stacks and links require manual recreation. Export one notebook at a time—fine for tag-based systems like The best way to organize Evernote: Use tags.
Note: Use HTML only for non-Evernote compatibility; it omits tags and complicates imports.
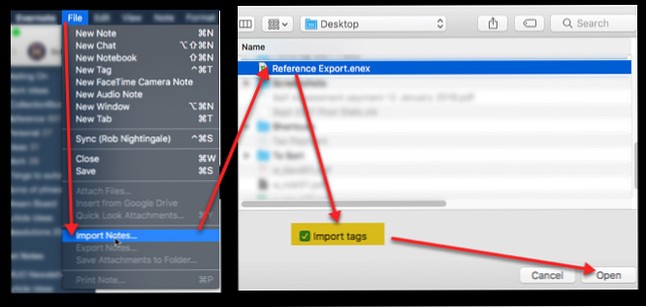
In Evernote: File > Import, select .ENEX, check import tags, and open. Notes land in a new notebook for reorganization.
Back up your entire PC using Windows Backup and Restore or Mac's Time Machine. This includes Evernote's database by default.
For selective backups, locate the database:

Windows: Tools > Options > General > Local Evernote Files (default: C:\Users\[username]\Evernote).
Mac: Hold Option, then Help > Troubleshooting > Open Database Folder.
Warning: Never modify this folder—it risks corruption. Restores are complex; contact Evernote support first.
Evernote prioritizes online sync and requires full database restores. Steps (offline first):
This salvages notes post-sync. Clunky but effective for corruption.
In our data-driven world, secure backups for Evernote, photos, WhatsApp, emails, etc., are essential. Tools like automatic photo backups, WhatsApp to Google Drive, and Outlook archiving safeguard everything.
Implement these now—better safe than sorry.
Do you back up Evernote regularly? Share why or why not below.