Family Encyclopedia >> Work

How to Automatically CC or BCC Yourself in Outlook and Gmail: Step-by-Step Guide

As a productivity expert with years of experience streamlining email workflows for teams and individuals, I've relied on automatic CC and BCC features to maintain records and keep colleagues informed without extra effort. Gmail and Outlook make it straightforward to set this up, ensuring key emails are always captured automatically.

This approach suits busy professionals but can clutter your inbox if overused. Outlook shines here with selective rules, offering full automation with precision.

Set Up Automatic CC or BCC in Gmail

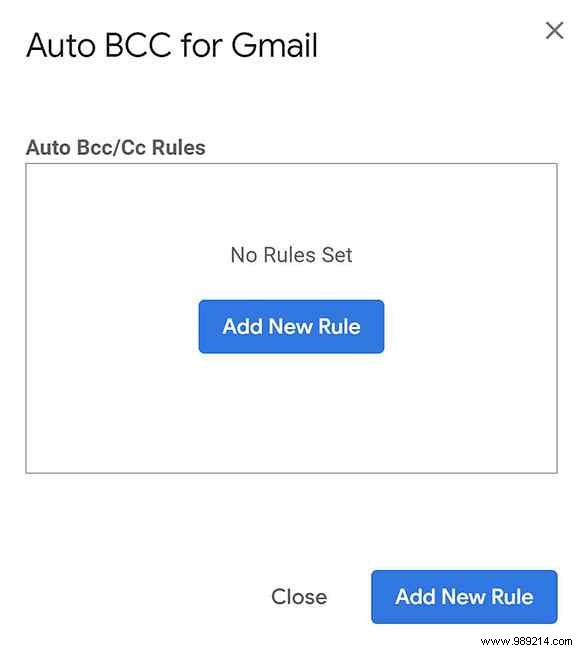
Gmail lacks a built-in feature for this, so use a trusted browser extension. Be mindful of permissions—many require broad access to your email and browsing data.

Options like Auto BCC for Gmail & Inbox need site-wide access, while BCC Me (not compatible with new Gmail) accesses Gmail data and history. The most secure choice is CloudHQ's Auto BCC for Gmail, limited to Gmail domain only.

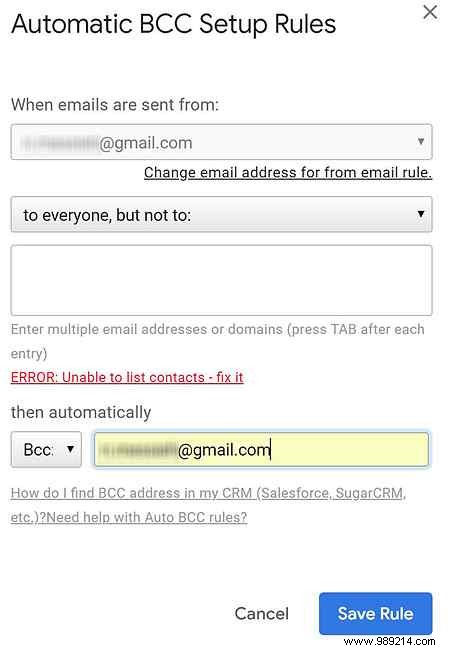
Once installed and authorized, create a rule:

  1. Click the Compose button to create a new email.
  2. Click the envelope icon next to the Send button. How to Automatically CC or BCC Yourself in Outlook and Gmail: Step-by-Step Guide
  3. In the dialog, click Add new rule. How to Automatically CC or BCC Yourself in Outlook and Gmail: Step-by-Step Guide
  4. Under When emails are sent from, your address is pre-filled. Select all, but not to and leave blank. Under then automatically, choose BCC (or CC) and enter your email. How to Automatically CC or BCC Yourself in Outlook and Gmail: Step-by-Step Guide
  5. Click Save rule.

To revoke access later, uninstall the extension and check myaccount.google.com/permissions for Gmail security. For non-Chrome users or privacy-focused setups, combine Gmail filters with forwarding and aliases—detailed in our guide on Email Aliases and Forwarding in Gmail.

Add the target as a forwarding address in Forwarding and POP/IMAP (they confirm via link), then filter outgoing mail to forward copies.

Set Up Automatic CC or BCC in Outlook

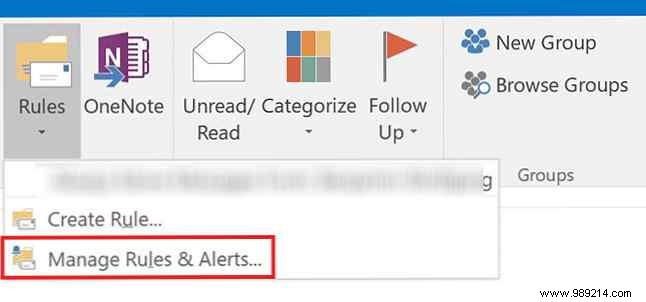
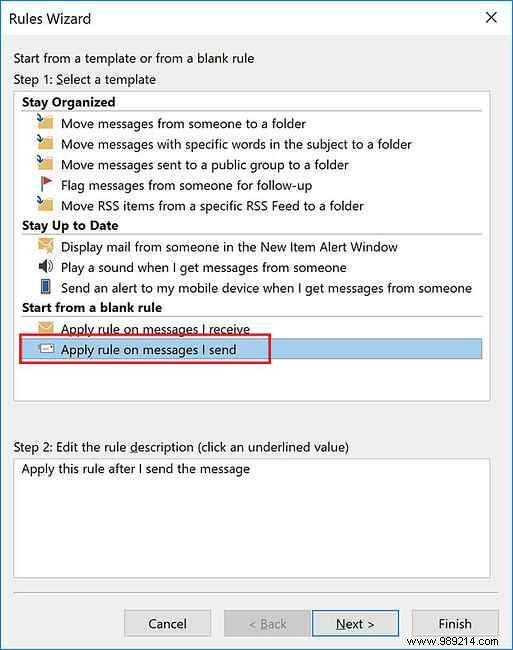
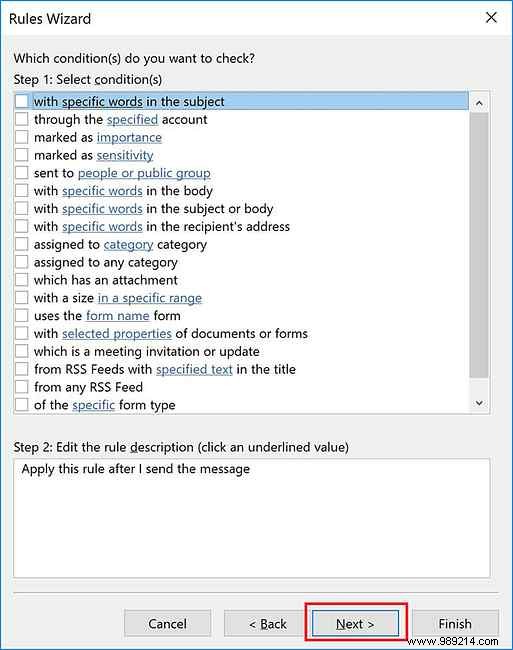
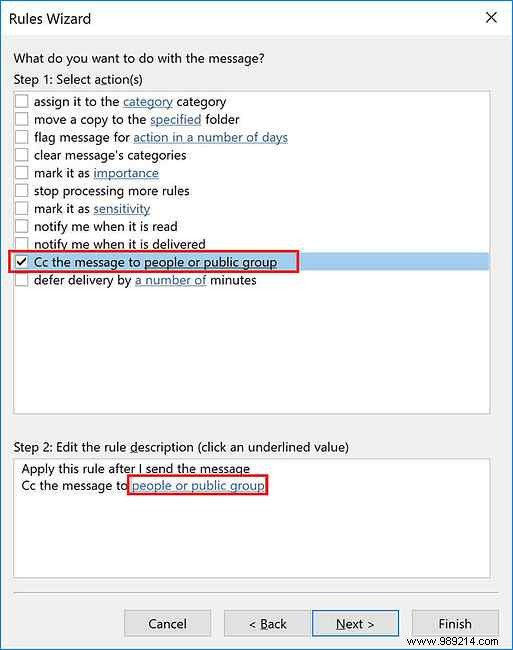
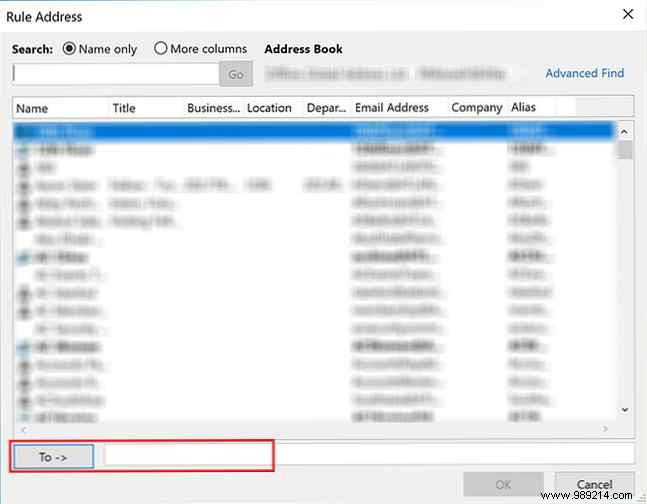
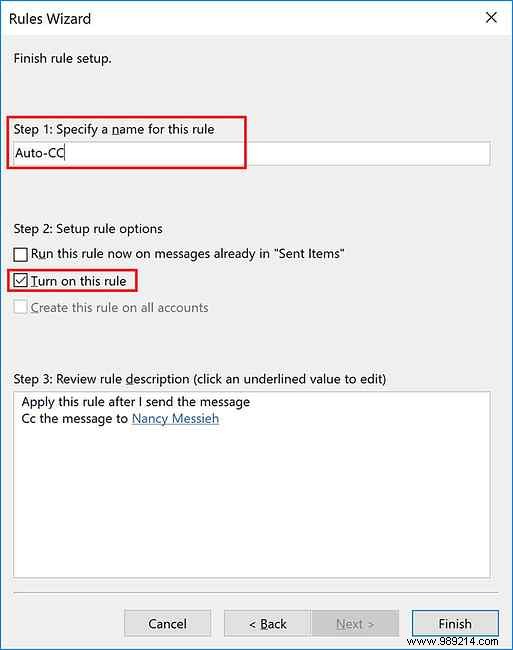
Outlook's Rules wizard handles this natively with flexibility for all or specific emails.

  1. On the Home tab, click the Rules arrow and select Manage Rules & Alerts. How to Automatically CC or BCC Yourself in Outlook and Gmail: Step-by-Step Guide
  2. Click New Rule.
  3. Select Apply rule on messages I send under blank rules, then Next. How to Automatically CC or BCC Yourself in Outlook and Gmail: Step-by-Step Guide
  4. Click Next for all sent emails, or set conditions for selectivity. How to Automatically CC or BCC Yourself in Outlook and Gmail: Step-by-Step Guide
  5. Select CC the message to people or public group. Click the link, add your email in the To field, then Next. For BCC-like (no visible CC), choose move a copy to specified folder and pick Inbox. How to Automatically CC or BCC Yourself in Outlook and Gmail: Step-by-Step Guide
  6. For CC: Enter your address in To. How to Automatically CC or BCC Yourself in Outlook and Gmail: Step-by-Step Guide
  7. Add exceptions if needed. How to Automatically CC or BCC Yourself in Outlook and Gmail: Step-by-Step Guide
  8. Name the rule and check Turn on this rule. How to Automatically CC or BCC Yourself in Outlook and Gmail: Step-by-Step Guide

Explore more email automation like canned responses (Email Faster with Canned Replies) or out-of-office replies (Set Up Outlook OOO Responder) to supercharge your inbox.