Need a printable form for handwritten entries? Creating blank lines in Microsoft Word is straightforward and reliable. As someone who's designed countless forms over years of using Word professionally, I can confirm this tab-based method delivers precise, aligned results every time.
Before printing, perfect your output with our expert guide: How to Print Microsoft Office Documents the Right Way. It covers all settings for flawless prints.
The Tab Method is one of the quickest ways to add blank lines for forms. Tab stops let you extend lines exactly where needed.
Start with your field label, like Name: followed by a space.
Head to the Ribbon > Home > Paragraph group. Click the dialog launcher arrow, then the Tabs button at the bottom.
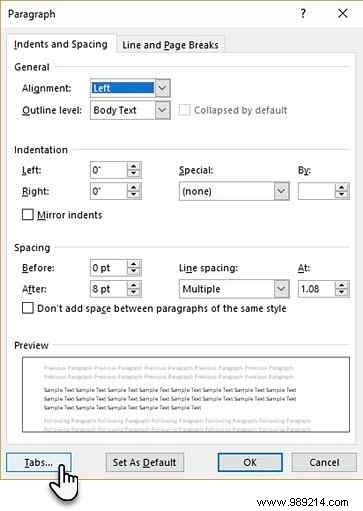
In the Tabs dialog, click Clear All.
Under Tab stop position, enter inches from the left margin, e.g., 5".
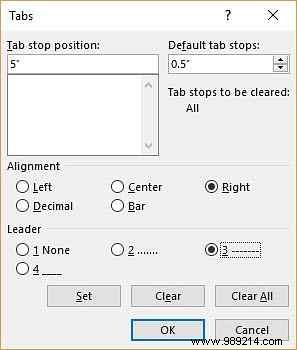
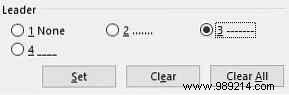
Set Alignment to Right, and Leader to 3 for a dashed line. Leaders add dots, dashes, or lines for visual guides.
Click Set, then OK.
Position the cursor after the label and press Tab. A dashed line appears, ending precisely at your tab stop.
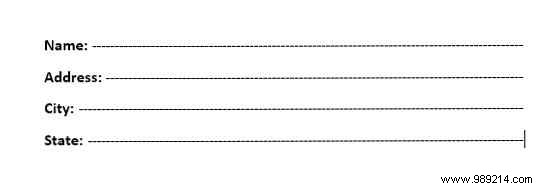
Hit Enter, add the next label (e.g., Address:), and Tab again. Repeat for all fields. Tabs ensure perfect alignment for printing.
Bonus: Leader tabs work great for tables of contents too. Where do you use them? Share your favorite Word formatting trick below.