You've probably noticed those striking oversized capital letters that launch a paragraph with flair. That's a drop cap.
A drop cap is the enlarged initial letter of a paragraph, dwarfing the surrounding text and often spanning multiple lines for visual impact.
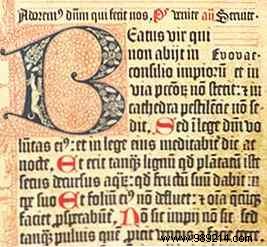
Examine this historic drop cap below, where the 'U' in 'Unfolds' elegantly descends over the next few lines. Drop caps have adorned texts for over 2,000 years—this example is more than 550 years old.
Today, desktop publishing embraces drop caps widely. Websites use them sparingly due to rendering challenges across devices, but CSS in HTML or WordPress plugins make them viable.
How do you add drop caps in Microsoft Word? As a seasoned Word user, I've found these proven methods simple and effective for elevating any document.
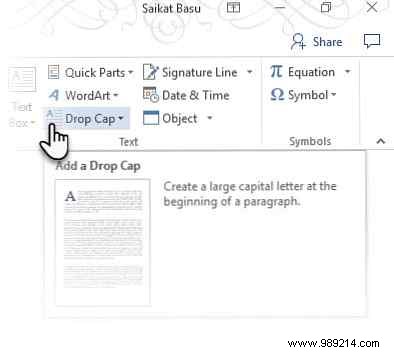
In Microsoft Word 2016 and later, a dedicated Drop Cap button simplifies the process to just two clicks.
Select the first character of your target paragraph.
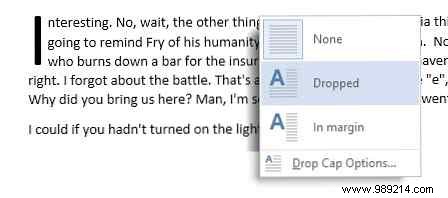
Head to the Insert tab on the Ribbon. In the Text group, click Drop Cap. The dropdown offers three options:
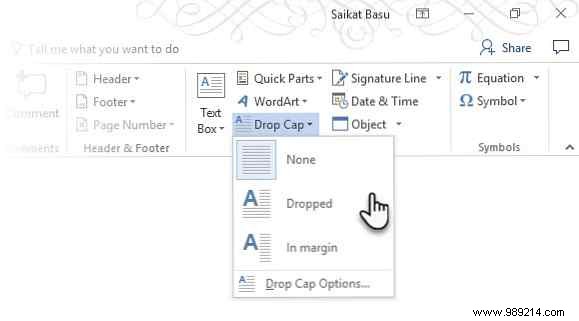
Dropped: Drops the cap into the paragraph height.
In margin: Places it alongside the paragraph in the margin.
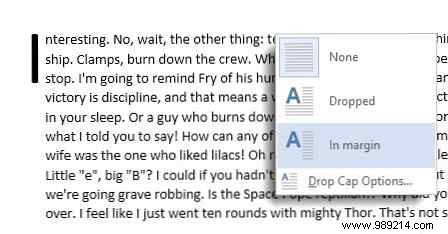
None: Removes an existing drop cap.
It defaults to dropping three lines.
Customize via Drop Cap Options in the dropdown. This dialog lets you adjust the font, lines to drop, and spacing from the text.
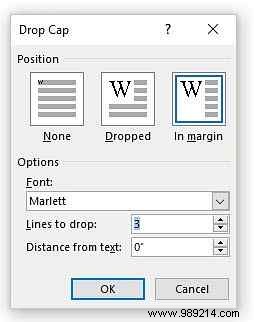
Click OK to apply.
A text box encases the drop cap. Click outside to show handles, then drag to resize on the fly.
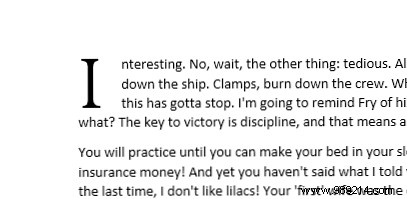
For instance, drag the middle-right handle to adjust spacing, or the bottom-center for height. Right-click the box for quick access to options.
Images offer more intricate, colorful drop caps than text. Create your own or source from Microsoft's Online Pictures—an evolution of Clip Art with Bing search integration.
10 New Features in Microsoft Office 2016 to Boost Productivity reveals related updates.
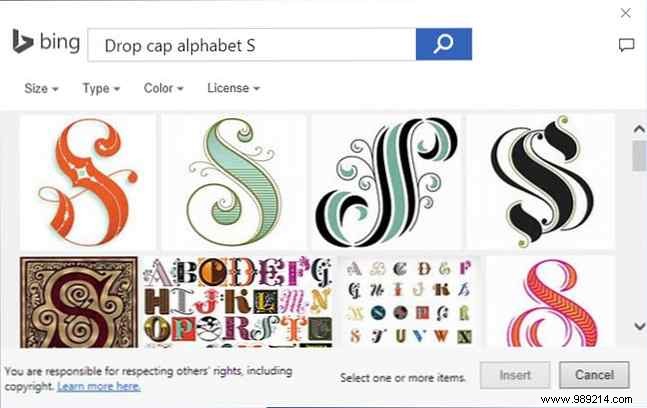
Note: Respect usage rights. Bing defaults to Creative Commons-licensed images for free personal or commercial use, sharing, and modification. What is Creative Commons, and should I use it?
Insert the image, then drag corner handles to fit. Hold Shift to maintain aspect ratio.
For precise control, select the image, go to Picture Format under Picture Tools, and choose Wrap Text options. "In line with text" works well by default.
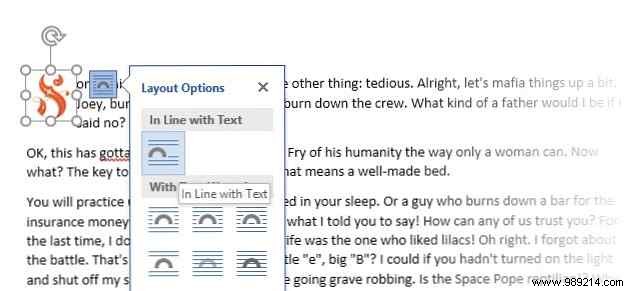
Right-click for Wrap Text (dog icon). Fine-tune alignment via Layout Options > More Layout Options.
Before do's and don'ts, explore styling ideas. How to style fonts in Microsoft Word to make your text stand out covers basics like color, size, or effects.
Extend to multiple letters: Select and insert after the first—but results vary.

Fancy fonts amplify appeal: Try Vivaldi or Old English Text from your installed fonts.

Want Gorgeous Free Fonts? Here are 25+ sites where you'll find them. Search "Drop Cap Fonts" on sites like DaFont.com or 1001Fonts.com for themed options.
In multi-column layouts, add drop caps to each column's first paragraph.
How to Create a Resume Template Using Microsoft Word—ideal for resumes showcasing creativity.
Tempted to overuse? Heed these guidelines:
Subtle drop caps transform documents. We've covered Word techniques, but they suit any design. How to create an attractive cover in Microsoft Word pairs well.
Artist Jessica Hische's Daily Drop Cap project offers free stylized initials; her Skillshare lettering class teaches creation.
Do you use drop caps? Share your creative Microsoft Word tips below!