Family Encyclopedia >> Work

How to Enable Selective Editing in a Protected Word Document

Collaborating on Microsoft Word documents doesn't require granting full access to everyone. Beyond read-only or comments-only modes, Word lets you protect most of the file while allowing edits to specific sections—a powerful feature for controlled teamwork. With over a decade of experience optimizing document workflows for teams, I've relied on this method countless times to maintain security and productivity.

This approach, available in Word 2016 and later versions, ensures collaborators can update designated areas without altering the rest. Here's a step-by-step guide based on proven practices.

How to Allow Changes in Specific Parts of a Restricted Word Document

  1. Go to the Review tab > Protect group > Restrict Editing.
  2. In the Editing restrictions section, check Allow only this type of editing in the document.
  3. From the dropdown, select No changes (Read only).
    How to Enable Selective Editing in a Protected Word Document
  4. Select the sections you want to make editable. Hold Ctrl to select multiple non-adjacent areas.
  5. Under Exceptions (Users...), check Everyone or click More users to add specific usernames or email addresses.
  6. Click Yes, Start Enforcing Protection.
  7. Set an optional password in the dialog. Those with the password can unprotect the entire document; others edit only permitted areas.
    How to Enable Selective Editing in a Protected Word Document

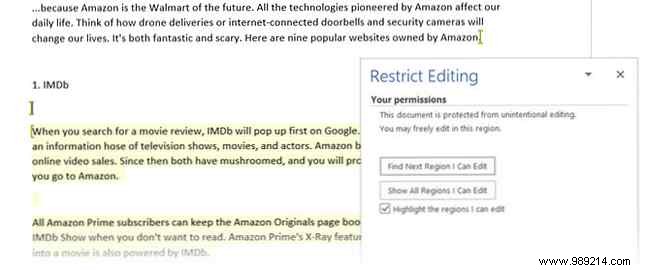
Once protected, recipients see the Restrict Editing task pane with navigation to editable sections. This setup fosters secure collaboration without compromising your document's integrity.