Family Encyclopedia >> Work

Expert Guide: How to Compare Microsoft Word Documents Using Legal Blackline

As a Microsoft Word specialist with years of experience helping legal professionals and teams streamline document reviews, I recommend the Legal Blackline feature for precise comparisons. Originating from the legal field for contract reviews, this tool works for any documents.

Side-by-side manual comparisons waste time and invite mistakes. Word's Review pane provides a smarter solution.

How to Compare Microsoft Word Documents

The Legal Blackline tool analyzes two documents, displaying changes in a new third document by default.

  1. Launch Microsoft Word and open the two documents to compare.
  2. Go to Ribbon > Review > Compare group. Click Compare.
    Expert Guide: How to Compare Microsoft Word Documents Using Legal Blackline
  3. Select Compare two versions of a document (legal blackline). Browse for the Original document and Document revised.
    Expert Guide: How to Compare Microsoft Word Documents Using Legal Blackline
  4. Click More to adjust settings: Choose character- or word-level changes under Show changes. Select output document if not using a new one. These settings become defaults for future comparisons.
  5. Click OK.
  6. If either document has tracked changes, click Yes to accept them and proceed with the comparison.

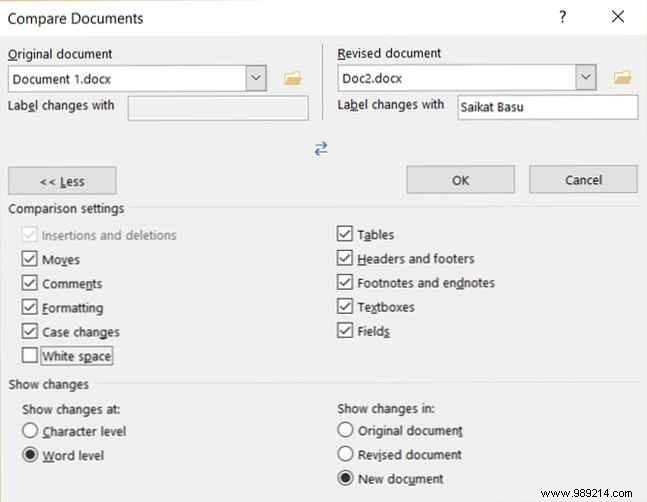
The result opens in a new document with the Reviewing Pane active, showing accepted changes from the original and tracked changes from the revised version. Customize the view via Ribbon > Review > Tracking group.

Need to compare Excel files? Learn How to Compare Two Excel Files using side-by-side views or conditional formatting.