As an experienced Excel user with years of spreadsheet management under my belt, I know the value of precision. If you're ramping up your Excel skills, check out our 8 essential tips to master Excel fast—perfect for beginners adding formulas and handling data efficiently. While dragging with the mouse works for quick adjustments to row heights and column widths, manual entry ensures exact measurements every time.
There are two reliable methods to access these settings, both straightforward and precise.
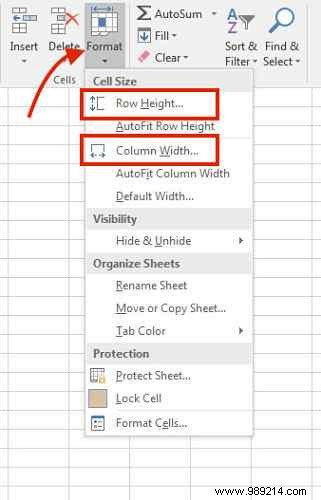
Select the cell in the row or column you want to adjust. Head to the Home tab > Cells group > Format. Under Cell Size, choose Row Height or Column Width. For multiple rows or columns, select at least one cell in each.
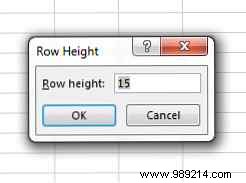
A dialog box appears—enter your desired value in points (Excel's default unit) and click OK. The changes apply instantly.
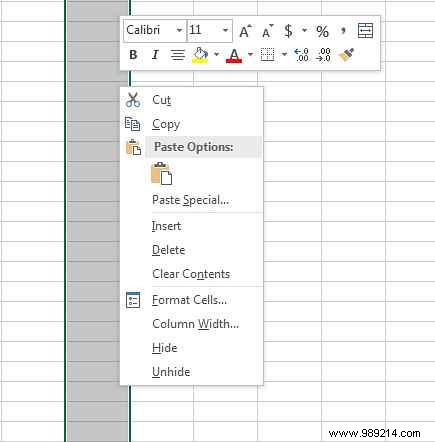
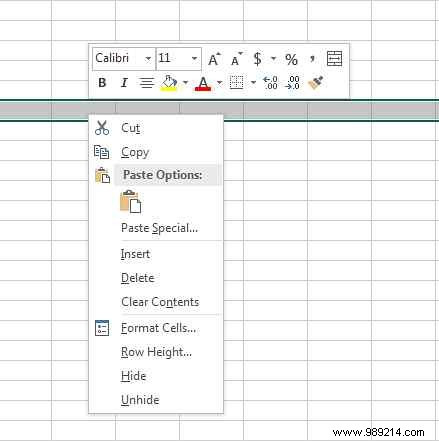
Select the entire row or column, right-click, and choose Column Width (for columns) or Row Height (for rows). The same dialog opens for manual input. This works for multiple selections too—just highlight them all first.
Prefer inches or centimeters? Switch to View tab > Workbook Views > Page Layout. Then, via the Office Button (or File menu in newer versions) > Excel Options > Advanced > Display, select your preferred ruler units.
What's your go-to Excel trick for efficiency? Share in the comments below!