Mail merge saves time and effort on repetitive tasks like printing labels. Follow this expert guide to master the process from setup to print.
Mail merge is a powerful feature in Microsoft Office, yet many users overlook it due to unfamiliarity. As seasoned Office experts, we've streamlined the process for you—it's simpler than it seems when your documents are properly prepared.
Once set up, mail merge excels at creating custom index cards, How to Make Index Cards in Microsoft Word 2016, personalized letters, or address labels. It's intimidating only at first; this tutorial, tested on Office 365, makes it straightforward.
We demonstrated this using the Office 2016 upgrade available for free with Office 365 subscriptions: Office 2016 Upgrade for Free Today with Your Office 365 Subscription. Microsoft Office 2016 brings smart new features—if subscribed, upgrade now.
Mail merge pulls data from a source like an Excel spreadsheet or Access database (Excel vs. Access: Can a Spreadsheet Replace a Database?) into Word fields. Start by formatting your source correctly.
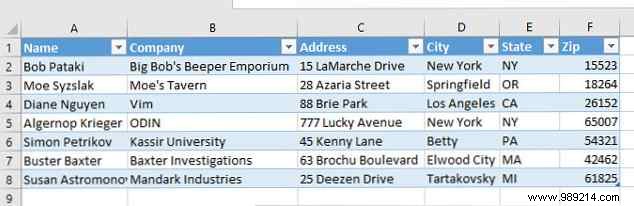
For this guide, we'll use a mailing list with fields: Name, Company, Address, City, State, Zip Code. Adapt as needed.
In Excel, create a table with your data. Use column headers for easy selection later.
Separate data into columns with descriptive headers. Select all data (including headers), go to the Formulas tab, and click Define Name.

Name the range descriptively (e.g., 'MailingList2023'). Save and close Excel.
For a Word source, insert a table via Insert > Table. Size it to match your columns (8 Formatting Tips for Perfect Tables in Microsoft Word).
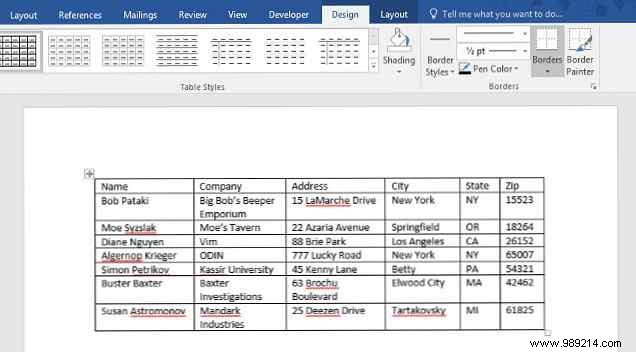
Enter data accurately under headers. Save and close.
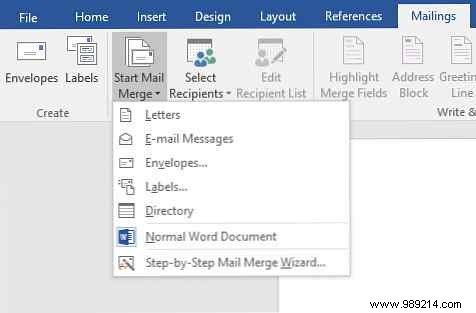
Open a new Word document. Go to Mailings tab > Start Mail Merge > select Labels.
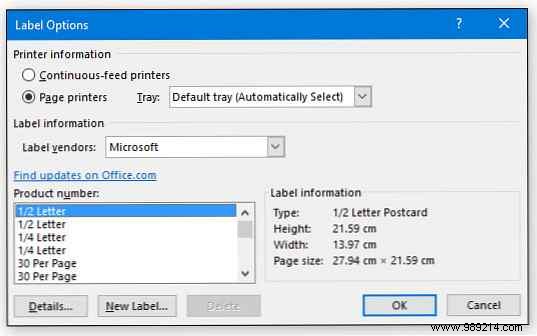
For labels, set print options: choose Default tray and label product number.
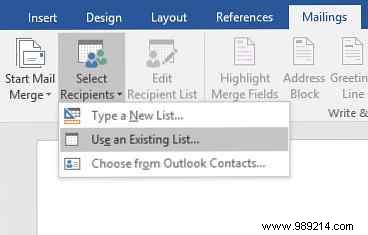
In Mailings, click Select Recipients > Use an Existing List.
Locate your Excel or Word file (How to Integrate Excel Data into a Word Document). Confirm the first row has headers.
Click Address Block to insert fields.
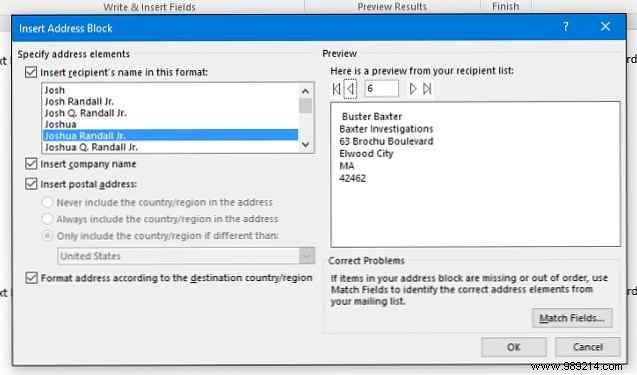
Customize fields (e.g., name format). For precision, insert fields manually via Insert Merge Field (5 Ways to Remove Formatting When Copying & Pasting Text).
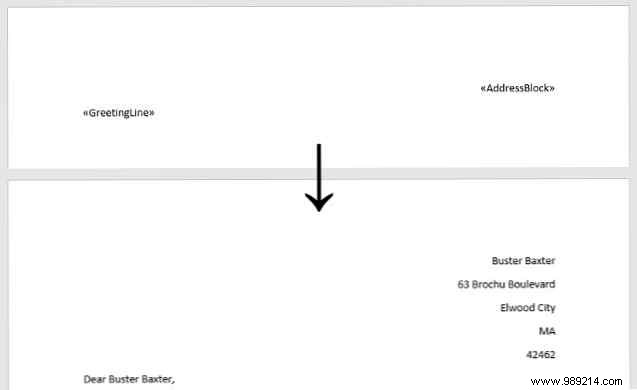
Use Preview Results to check output. Adjust fonts if needed (5 Sites to Discover and Download Free Fonts).
Finally, Finish & Merge > Print Documents or Edit Individual Documents.
Share your mail merge tips or questions in the comments—we're here to help!