Excel is a powerful tool for data analysis and creative projects alike. Explore 7 Weird Fun Things You Can Create With Microsoft Excel—imagine the possibilities beyond numbers. But what good is a beautifully designed spreadsheet if it prints poorly?
With targeted adjustments to your spreadsheet and Excel settings, you can fit everything on one page or distribute it neatly across multiple pages for a professional finish. As Excel experts with years of experience optimizing workflows, we've refined these proven techniques to save you time, paper, and frustration.
Always start here to avoid wasting paper. Navigate to File > Print (or File > Print Preview in older versions) to see exactly how your sheet will appear. If it looks good, print. Otherwise, apply the strategies below. Pro tip: Use a print management solution like PaperCut to control costs and reduce waste—learn more.
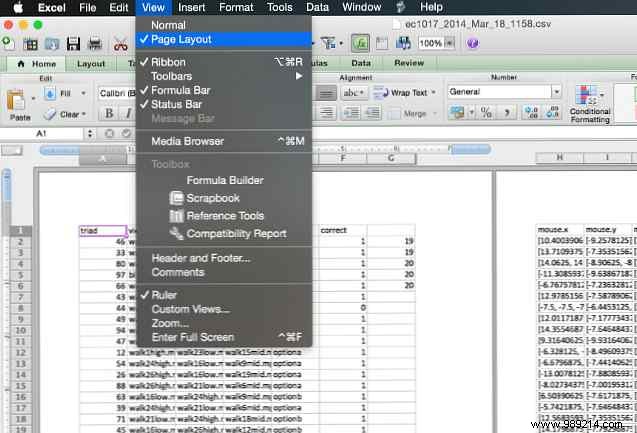
This view displays your sheet as it will print, helping you optimize space. Go to View > Page Layout. It's ideal for tweaking rows and columns without surprises.
Make changes here for real-time feedback. The same applies in Word for polished documents—see how.
Wide sheets? Switch to landscape. Tall ones? Portrait works best. Open Page Setup (via File > Print or the dialog) and select under the Page tab.

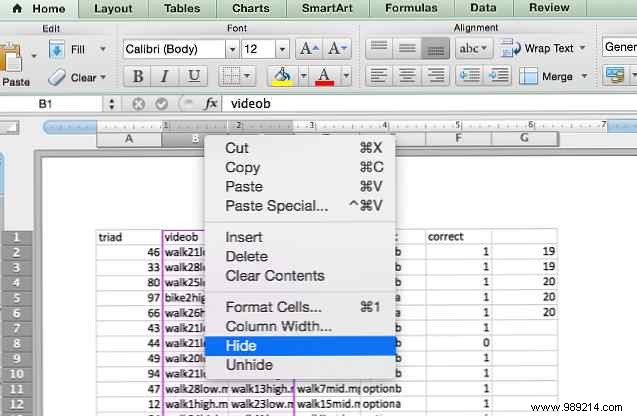
Large sheets often have redundant data. Delete via select > right-click > Delete, or hide by right-clicking headers > Hide. Unhide by selecting adjacent areas > right-click > Unhide. This frees up space instantly.
Control splits precisely: Select a cell > Page Layout > Breaks > Insert Page Break. No more awkward Excel defaults.
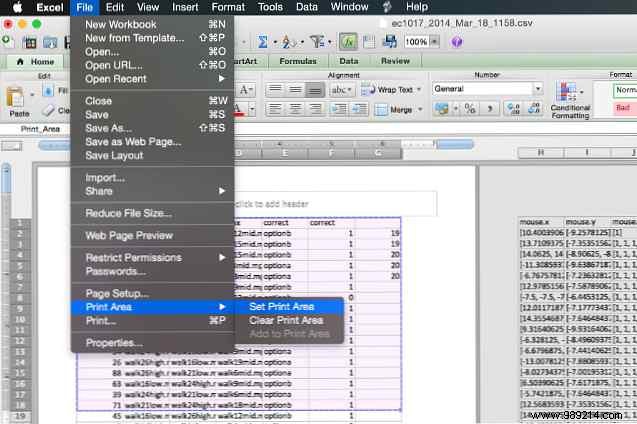
For partial prints, select cells > File > Print > set Print What to Selection. Make it permanent: Select area > Page Layout > Print Area > Set Print Area. Clear via Clear Print Area.
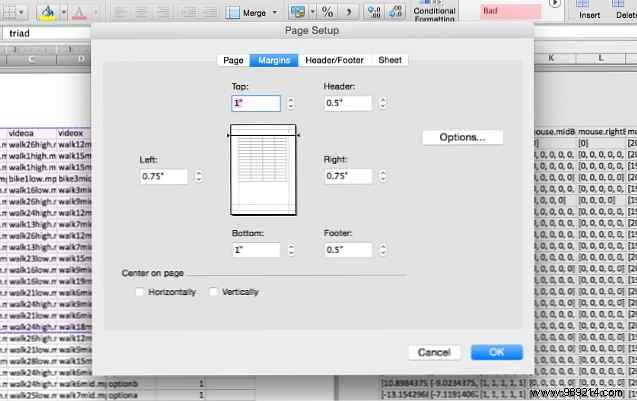
Need extra room? Access Page Setup > Margins tab > reduce slightly. Preview to balance readability—avoid crowding edges.
Text-heavy cells widen sheets unnecessarily. Enable Home > Wrap Text, then drag column borders or double-click for auto-fit. Perfect for text operations—master them here.
Avoid cutoffs like this:
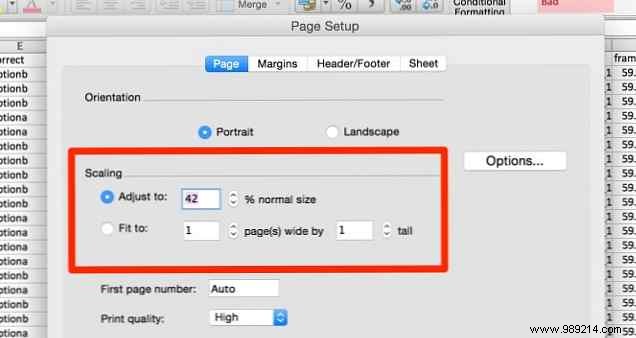
Last resort: Page Setup > Page tab > Fit To > set pages wide/tall or percentage. Ideal for charts—choose the right type. Always preview; tiny text defeats the purpose.
Finalize with these:
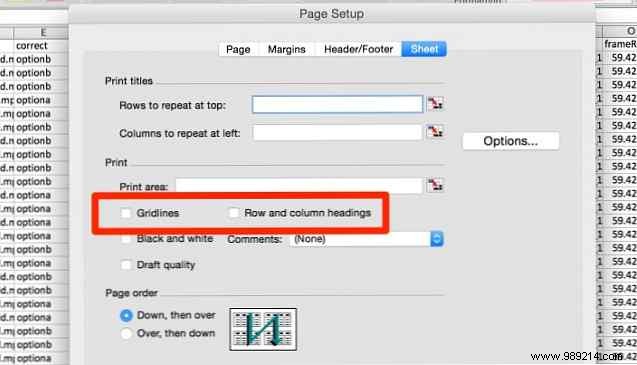
Page Setup > Sheet tab > check Gridlines and Row and column headings.
Page Setup > Header/Footer tab > insert page numbers, filename, etc. Custom text via buttons. Keeps multi-page prints organized.
These tweaks ensure crisp, one-page Excel prints—or multi-page mastery. Boost your Office skills further: essential Excel and Word tips.
Got more printing hacks? Share in the comments!